Manage permissions for Microsoft Sentinel across Multiple Environments with Lighthouse
Manage permissions for Microsoft Sentinel across Multiple Environments with Lighthouse
Manage Permissions for Microsoft Sentinel Across Multiple Environments with Lighthouse
Introduction
For organizations, MSP’s or perhaps enthusiastic Homelab users managing Microsoft Sentinel across multiple environments can be a time consuming workload. To create a structured way of authorization/access and ease things up within these environment we can use Azure Lighthouse!
What is Azure Lighthouse?
Azure Lighthouse offers a scalable, efficient way to manage services across multiple Azure tenants. It’s designed to help service providers create a structured governance, see which offers have certain sets of roles. This helps in managing resources of different tenants.
Key Benefits
- Centralized Management: Manage multiple Azure tenants
- Enhanced Security: Provides robust, granular access control.
- Cross-Tenant Visibility: Offers a unified view of resources across different tenants based on your template.
Implementation
Although we could pick different approaches and take automation in consideration with bicep templates or API’s I try to keep this approach as easy as possible. Therefore we pick the JSON Template format and deploy a “Custom Deployment” via Azure portal. If you are not known yet with JSON template, make sure to read the Microsoft documentation. It is most useful, and a fun way to learn more about deploying resources!
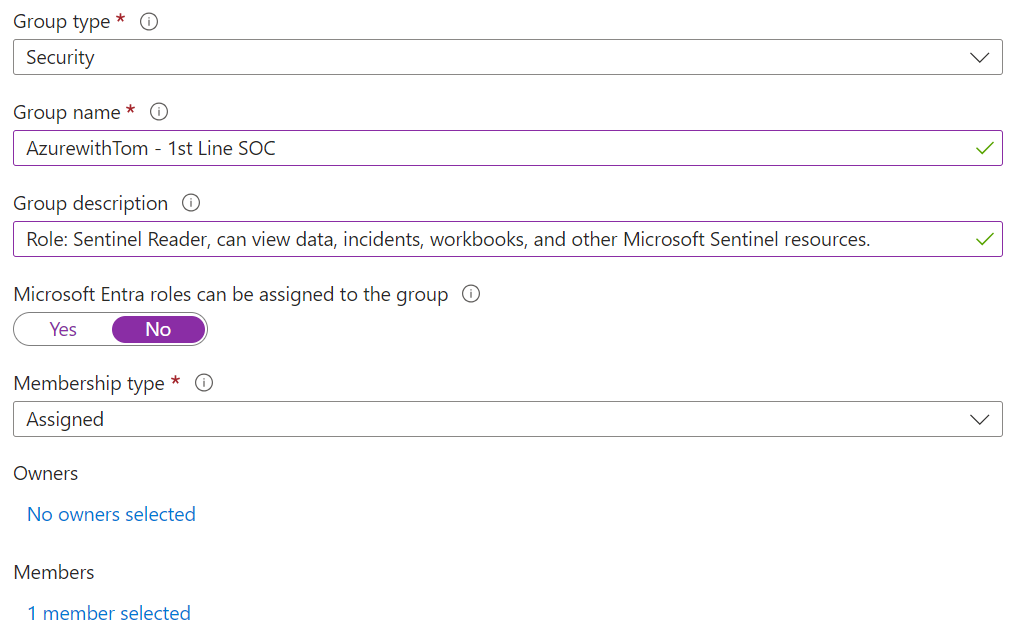
Before we begin we should create a few groups within Entra ID to be able to attach these groups in our template. These groups can be attached to for example access packages for access based on function within an organization or add users the traditional way.
Creating Groups
Before we begin we should create a few groups within Entra ID to be able to attach these groups in our template. These groups can be attached to for example access packages for access based on job title within an organization or add users the traditional way. These groups are an example of setting up. There are more roles and ways to use this. Make sure you check your current access and review where needed.
- AzurewithTom - 1st Line SOC
- AzurewithTom - 2nd Line SOC
- AzurewithTom - Reader
- AzurewithTom - Playbook Operator
- AzurewithTom - Sentinel Contributor
Check out the list of Roles to see which role gives what access.
The Template
Once you got that set we can continue to setup our template. Let’s start with explaining each section of the template that you will find further up on this page.
Parameters Section
mspOfferName: Unique name for your offer.mspOfferDescription: Description of the MSP offering.
Variables Section
managedByTenantId: Your specific Azure Tenant ID.authorizations: Array of authorization objects withprincipalId,roleDefinitionId, andprincipalIdDisplayName.
Resources Section
This section contains resource definitions for registrationDefinitions and registrationAssignments and requires no further input. It uses the values from the variables and parameters sections. Usually, no modifications are needed here unless specific changes to the resource structure are required by your end.
Outputs Section
Outputs the offer name and authorizations array.
Example Template
Use the information above in combination with the Microsoft documentation to add the parameters as you want it to be. You can copy the template easily by clicking the clipboard.
1
2
3
4
5
6
7
8
9
10
11
12
13
14
15
16
17
18
19
20
21
22
23
24
25
26
27
28
29
30
31
32
33
34
35
36
37
38
39
40
41
42
43
44
45
46
47
48
49
50
51
52
53
54
55
56
57
58
59
60
61
62
63
64
65
66
67
68
69
70
71
72
73
74
75
76
77
78
79
80
81
82
83
84
85
86
{
    "$schema": "https://schema.management.azure.com/schemas/2019-08-01/subscriptionDeploymentTemplate.json#",
    "contentVersion": "1.0.0.0",
    "parameters": {
        "mspOfferName": {
            "type": "string",
            "metadata": {
                "description": "Specify a unique name for your offer"
            },
            "defaultValue": "NAMEOFYOUROFFER"
        },
        "mspOfferDescription": {
            "type": "string",
            "metadata": {
                "description": "Name of the Managed Service Provider offering"
            },
            "defaultValue": "Delegated Subscription access for the use of Microsoft Sentinel"
        }
    },
    "variables": {
        "mspRegistrationName": "[guid(parameters('mspOfferName'))]",
        "mspAssignmentName": "[guid(parameters('mspOfferName'))]",
        "managedByTenantId": "YOURTENANTID",
        "authorizations": [
            {
                "principalId": "GROUPOBJECTID",
                "roleDefinitionId": "8d289c81-5878-46d4-8554-54e1e3d8b5cb",
                "principalIdDisplayName": "AzurewithTom - 1e lijn SOC"
            },
            {
                "principalId": "GROUPOBJECTID",
                "roleDefinitionId": "3e150937-b8fe-4cfb-8069-0eaf05ecd056",
                "principalIdDisplayName": "AzurewithTom - 2e lijn SOC"
            },
            {
                "principalId": "GROUPOBJECTID",
                "roleDefinitionId": "8d289c81-5878-46d4-8554-54e1e3d8b5cb",
                "principalIdDisplayName": "AzurewithTom - Reader"
            },
            {
                "principalId": "GROUPOBJECTID",
                "roleDefinitionId": "51d6186e-6489-4900-b93f-92e23144cca5",
                "principalIdDisplayName": "AzurewithTom - Playbook Operator"
            },
            {
                "principalId": "GROUPOBJECTID",
                "roleDefinitionId": "ab8e14d6-4a74-4a29-9ba8-549422addade",
                "principalIdDisplayName": "AzurewithTom - Sentinel Contributor"
            }
        ]
    },
    "resources": [
        {
            "type": "Microsoft.ManagedServices/registrationDefinitions",
            "apiVersion": "2020-02-01-preview",
            "name": "[variables('mspRegistrationName')]",
            "properties": {
                "registrationDefinitionName": "[parameters('mspOfferName')]",
                "description": "[parameters('mspOfferDescription')]",
                "managedByTenantId": "[variables('managedByTenantId')]",
                "authorizations": "[variables('authorizations')]"
            }
        },
        {
            "type": "Microsoft.ManagedServices/registrationAssignments",
            "apiVersion": "2020-02-01-preview",
            "name": "[variables('mspAssignmentName')]",
            "dependsOn": [
                "[resourceId('Microsoft.ManagedServices/registrationDefinitions/', variables('mspRegistrationName'))]"
            ],
            "properties": {
                "registrationDefinitionId": "[resourceId('Microsoft.ManagedServices/registrationDefinitions/', variables('mspRegistrationName'))]"
            }
        }
    ],
    "outputs": {
        "mspOfferName": {
            "type": "string",
            "value": "[concat('Managed by', ' ', parameters('mspOfferName'))]"
        },
        "authorizations": {
            "type": "array",
            "value": "[variables('authorizations')]"
        }
    }
}
Deploying Your Template
So you got your groups created, template set with the correct parameters and roles. You’ve checked it a thousand times, so it’s time to deploy it!
- Log in to the Azure Portal of the tenant you want to manage (not the one in the template).
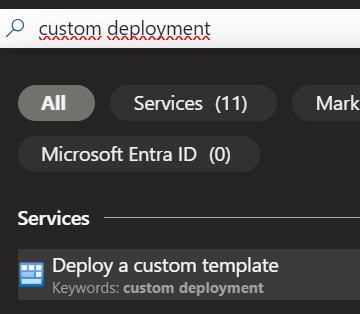
- Search for “Custom deployment” and click on “Deploy a custom template”.
Or take the shortcut: Deploy a custom template 😉
- Click on “Build your own template in the editor”, remove the default code, and add your template. Save to continue.
- Ensure everything is correct and select your preferred region (e.g., West Europe). Click Next to validate and deploy.
Validate It Works
To ensure the deployment is correct:
- Go to “Service Providers“ in the Azure Portal to see if your offer is listed.
- In your main tenant, navigate to Microsoft Sentinel in the Azure Portal.
- If you have selected multiple subscriptions you will be able to see more Sentinel Workspaces.
If you don’t see a Microsoft Sentinel workspace, adjust the visible subscriptions within the filter.
If you made it this far, awesome! I hope you learned something new and useful.


